Virtual Host allows you to run multiple websites from a single physical server or Virtual Private Server. There are two types of virtual hosts on Apache:
IP-Based Virtual Hosting – every individual website on the Apache Server uses a different, unique IP address.Name-Based Virtual Hosts – enables you to add multiple domains using a single IP address.This tutorial shows you how to set up Apache Virtual Hosts on an Ubuntu 18.04 system.
Prerequisites
Apache Virtual Host allows you to maximize your resources when setting up a website. With this powerful software, can use a single server and a single IP address to host a number of different domains.
Before you can configure Apache Virtual Hosts, you need to install the Apache webserver. To do so, run the command:
sudo apt-get install apache2If you have any problems setting up the web server, refer to our an in depth tutorial on installing Apache on Ubuntu.
Name-based virtual hosting allows the client to report the hostname to the server, as an element of the HTTP header. This feature means that one machine can host multiple websites sharing the same IP address.
Step 1: Create a Directory StructureEach virtual host needs to have a directory for storing virtual host data. Create directories and a directory structure at the following location /var/www. In our example, we’ve created phxnap1.com and phxnap2.com directories, one for each domain name.
1. Enter the following command and replace the example domain with your domain names:
sudo mkdir -p /var/www/phxnap1.com/public_htmlsudo mkdir -p /var/www/phxnap2.com/public_htmlWithin the directories, we also created public_html. These directories are going to store website files for the domains.
2. Next, create a sample index.html page for each domain, using nano or your favorite text editor. Start with the first domain:
nano /var/www/phxnap1.com/public_html/index.html3. Add the following sample HTML:
Welcome to phoenixNAP 1!Well done! Everything seems to be working on your first domain!
4. Save and exit the file.
5. Next, create a sample page for the second domain:
nano /var/www/phxnap2.com/public_html/index.html6. Add the following lines to the file:
Welcome to phoenixNAP 2!Well done! Everything seems to be working on your second domain!

7. Save and exit the second HTML file.
8. To prevent any permission issues modify the ownership of your document’s root directory to www-data. The chown command is useful in this instance:
sudo chown –R www-data:www-data /var/www/phxnap1.comsudo chown –R www-data:www-data /var/www/phxnap2.comYou have now successfully changed the directory ownership to the Apache User.
Step 2: Create a Virtual Host Configuration FileApache Virtual Host configuration files are stored in the /etc/apache2/sites-available directory.
1. To create a basic configuration file for your first domain, enter the domain information in the command:
sudo nano /etc/apache2/sites-available/phxnap1.com.conf2. Add the following configuration block to create a basic configuration file. This example uses the first test domain, phxnap1.com. Make sure to enter the correct domain for your website:
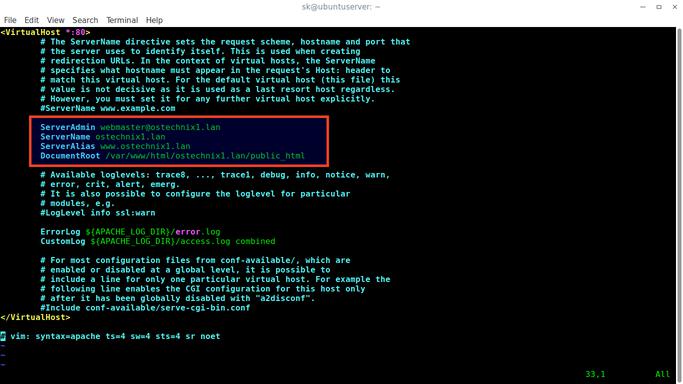
ServerAdmin webmaster@phxnap1.comServerName phxnap1.comServerAlias www.phxnap1.comDocumentRoot /var/www/phxnap1.com/public_htmlErrorLog ${APACHE_LOG_DIR}/phxnap1.com-error.logCustomLog ${APACHE_LOG_DIR}/phxnap1.com-access.log combinedServerName – represents the domainServerAlias – represents all other domains such as subdomainsDocumentRoot – the directory used by Apache to serve domain filesErrorLog, CustomLog – designates the log files locationThere is no established format. However, naming your configuration files based on the domain name is a “best practice”.
4. Once you have edited the config file for the first domain, repeat the process for the rest. In our case, we will run:
sudo nano /etc/apache2/sites-available/phxnap2.com.conf5. Then, add the configuration block as in the example above, making sure to change the values for phxnap2.com:
ServerAdmin webmaster@phxnap2.comServerName phxnap2.comServerAlias www.phxnap2.comDocumentRoot /var/www/phxnap2.com/public_htmlErrorLog ${APACHE_LOG_DIR}/phxnap2.com-error.logCustomLog ${APACHE_LOG_DIR}/phxnap2.com-access.log combinedStep 3: Enable Virtual Host Configuration FilesTo enable the virtual host file, create a symbolic link from the virtual host file to the sites-enabled directory. Apache2 reads this file when staring.
1. Use the a2ensite helper to enable the virtual host file with the command:
sudo a2ensite phxnap1.comThe output will appear as:
2. Repeat the process for the second domain by typing:
sudo a2ensite phxnap2.com3. Next, verify the configuration file syntax is correct using the command:
sudo apachectl configtestThe message in the terminal will confirm that the syntax is correct: “Syntax OK”
4. Restart Apache2 for the changes to be applied:
sudo systemctl restart apache25. The only thing left to do is to go to a web browser and access your websites. Based on the index.html file we created earlier, the appropriate message should appear for each domain.
phxnap1.comphxnap2.comStep 4: Configure Firewall (Optional)Modify your firewall settings to improve security by creating a rule to enable SSH on Ubuntu:
sudo ufw allow OpenSSHAdd the rules to allow access to Apache.
sudo ufw allow in “Apache Full”Next, enable the firewall.
sudo ufw enableIf you see a message saying “Command may disrupt existing SSH connections.”Press y. If the firewall is working properly, then you should see “Firewall is active and enabled on system startup.”
Conclusion
By following this tutorial, you have successfully created and configured an Apache Virtual Host on Ubuntu. You are now able to create multiple name-based virtual hosts, as well as run/host a large number of domains from a single server by using one IP address.
PREV: How to Resolve